


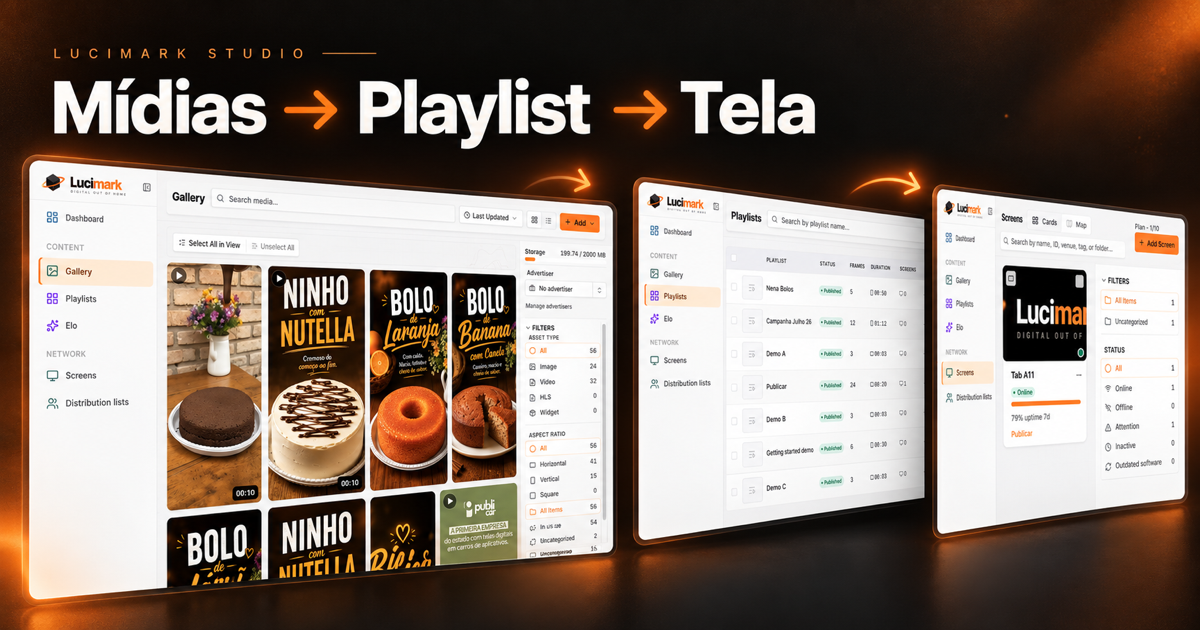
A promotion, a company presentation, or a notice for people walking through your space: it all starts with the content you want to show. In Lucimark Studio, organizing that communication follows four steps: upload your media, build a playlist, register the screen, and choose what it will play.
In this guide, you will walk that flow using the Gallery, Playlists, and Screens areas of the app.
The images are illustrative AI edits of the real interface, with fictional Café Aurora café content.
1. Upload your images and videos to the Gallery
The Gallery is your account’s content library. It is where you collect the files you will later use in playlists.
- Open Lucimark Studio and sign in to your account.
- In the side menu, click Gallery.
- Open Add and choose Upload.
- In the Upload media window, click the drop zone to select files or drag them onto it.
- Confirm the upload with the upload button and wait until it finishes.
For images, the interface accepts PNG, JPG, and WebP. For videos, MP4 and MOV. The app recommends 1920 × 1080 content for landscape screens and 1080 × 1920 for portrait screens, plus H.264 videos of about 8 to 15 seconds.
Prepare artwork for the screen orientation you will use, and name files so they are easy to find later, such as “september-promo-landscape”.
2. Build your first playlist
A playlist organizes the sequence of content you want to show. In the editor, that sequence is made of frames.
- Open Playlists and click Add playlist.
- Fill in Playlist name with something easy to recognize, such as “Café Aurora — Welcome”.
- Click Add media to open the library.
- Find the file with search or filters and drag it into the sequence area.
- Repeat to add the next pieces of content.
After you add an image, select the frame and adjust Duration in the properties panel. In the illustrative example below, a Café Aurora café creative appears with a duration of 10 seconds.
Use the frame’s drag control to set playback order. Check the result in Preview and, when the sequence is ready, click Publish.
Publishing the playlist and choosing the screen are separate steps. Next, you will connect the device and assign content to it.
3. Register the player in Screens
The player plays content on the display device. In Studio, that device is registered under Screens.
- On the device that will show the content, open player.lucimark.com.
- Note the five-character registration code shown by the player.
- In Studio, open Screens and click Add screen.
- Enter the code in the registration fields.
- Optionally fill in the name and description. A name like “Window display — Café Aurora” makes the device easier to identify.
- Click Save to finish registration.
4. Assign the playlist to the screen
With the playlist published and the player registered, choose what the screen should play.
- In Screens, find the device you want.
- Use the screen card’s content control, labeled Change content.
- In the Screen content window, find and select the playlist you want.
- Confirm the screen name at the top of the window and click Save.
Check the result on the device
After assignment, confirm the screen shows as Online in Studio and check playback on the device itself. Make sure the media is in the correct orientation, the sequence matches what you planned, and each message has enough time to be read.
If the expected content does not appear, check the device connection, the selected playlist, and whether you published the sequence. If you set scheduling or location on frames, review those conditions as well.
With this first flow done, you already have the base for organizing your communication: files in the Gallery, a sequence in Playlists, and content assigned to the right screen.